Learnvelo Instructor Guide: Adding Content to Your LMS
Learn how to add Learnvelo content into your LMS using deep linking
This guide shows instructors how to add Learnvelo content (courses, modules, and pages) into their LMS using the deep linking integration. Once your LMS administrator has completed the Learnvelo LTI setup, you can follow these steps to link Learnvelo content directly into your course.
Prerequisites
- Your LMS administrator has completed the Learnvelo LTI 1.3 setup
- You have an active Learnvelo account
- You have courses with content in Learnvelo that you want to share with students
How It Works
Learnvelo uses LTI Deep Linking to let you select and embed content from within your LMS. When you add Learnvelo as an external tool in your LMS course, a content picker opens that lets you:
- Choose a Learnvelo course
- Select what to link: a course overview, a specific module, or individual pages
- Configure display options and grade passback
- The selected content automatically appears in your LMS course
Students then click the link in the LMS to view the Learnvelo content -- no separate login required.
Launching the Content Picker
The steps to launch the Learnvelo content picker vary by LMS. Find your LMS below.
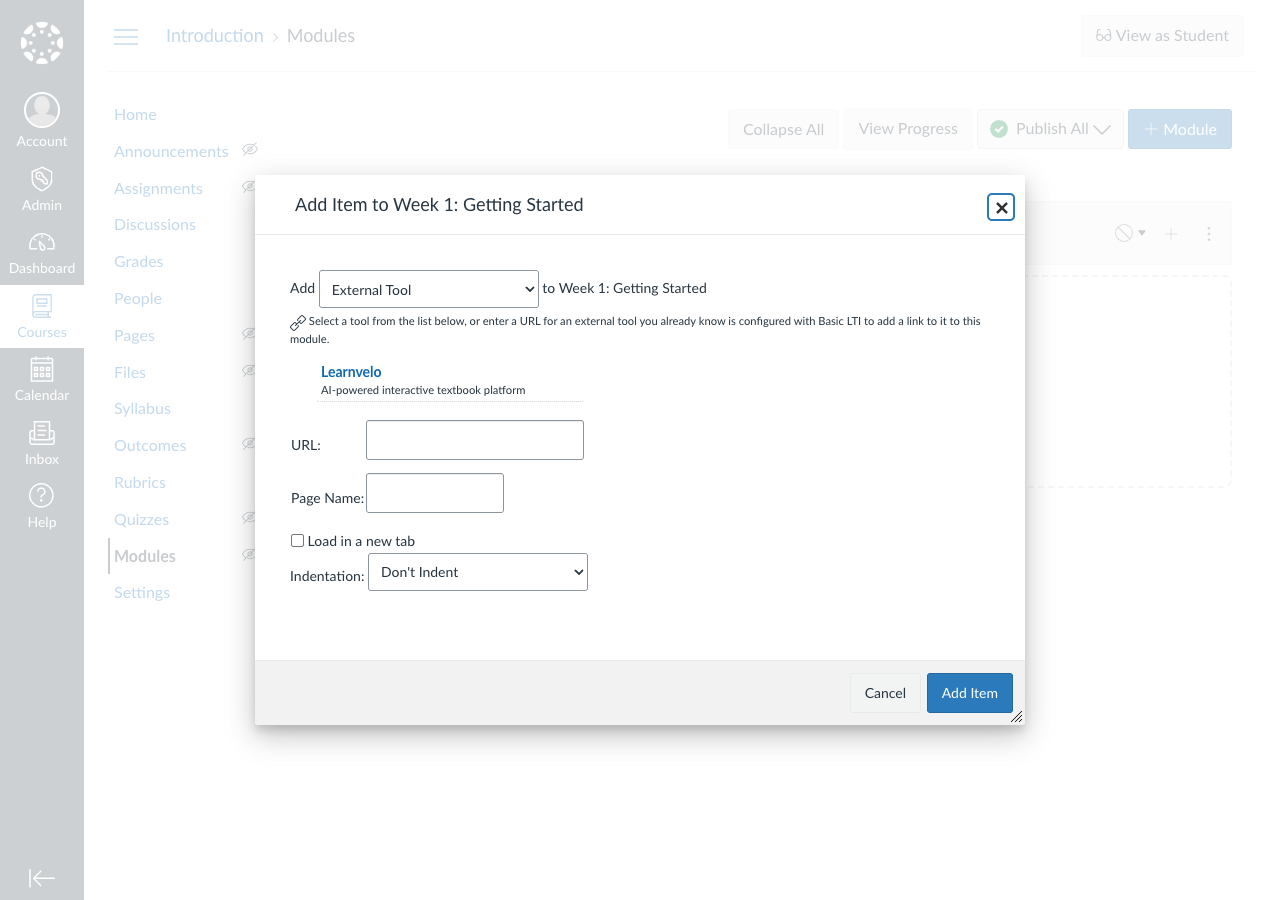
Canvas
- Navigate to your Canvas course
- Go to Modules (or Assignments, depending on where you want the content)
- Click + Module Item (or + Assignment)
- Select External Tool
- Choose Learnvelo from the tool list
- The Learnvelo content picker will open
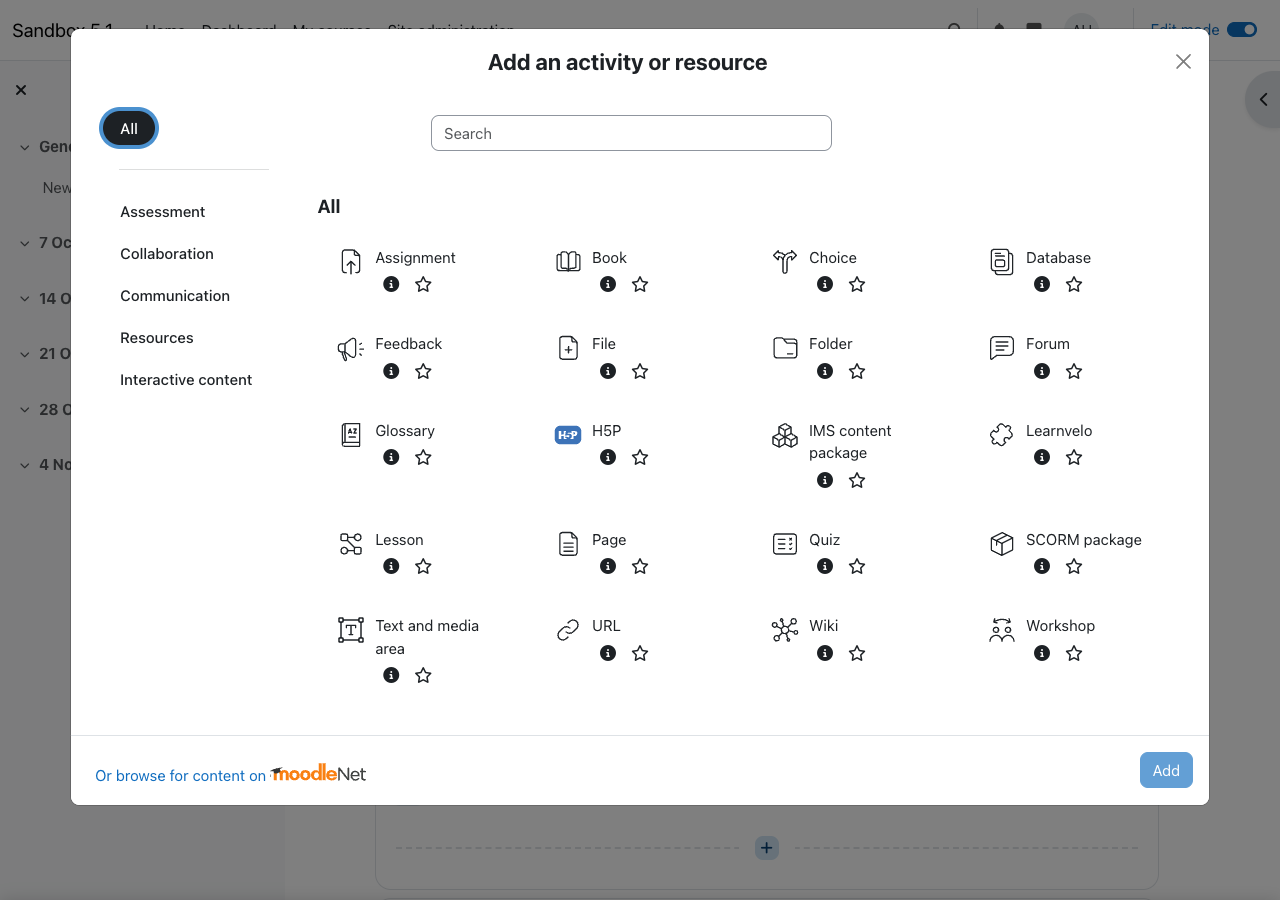
Moodle
- Navigate to your Moodle course
- Turn editing on
- In the section where you want to add content, click Add an activity or resource
- Select Learnvelo from the activity chooser (if your admin configured it to appear there), or select External tool and then choose Learnvelo under Preconfigured tool
- The Learnvelo content picker will open
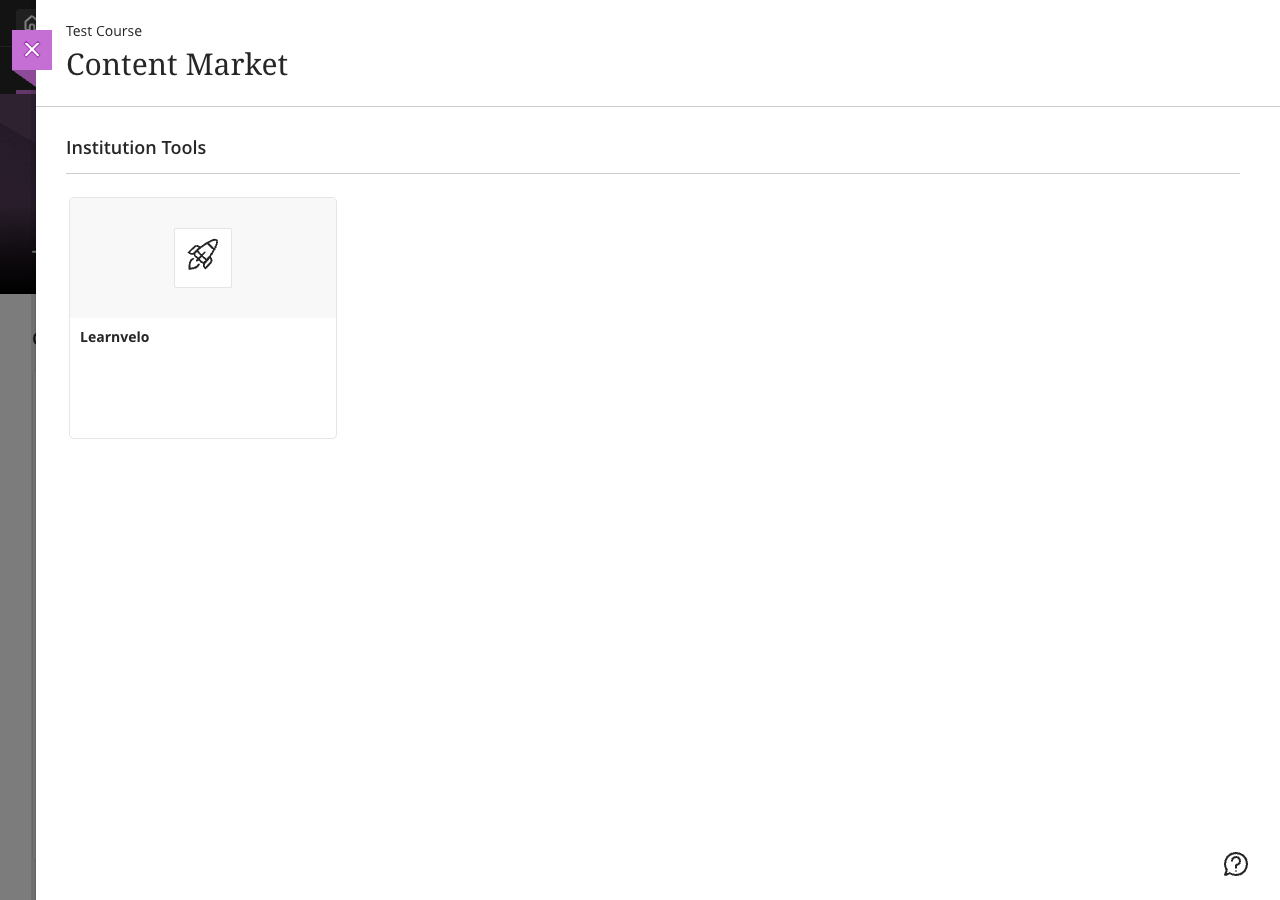
Blackboard
- Navigate to your Blackboard course
- In the Course Content area, click the + (Add Content) button
- Select Content Market
- Find and select Learnvelo from the available tools
- The Learnvelo content picker will open
D2L Brightspace
- Navigate to your Brightspace course
- Go to Content
- In the module where you want to add content, click Add Existing Activities
- Select External Learning Tools
- Choose Learnvelo from the list
- The Learnvelo content picker will open
Visual reference: See Create an External Learning Tool Link in D2L's documentation for screenshots of this workflow.
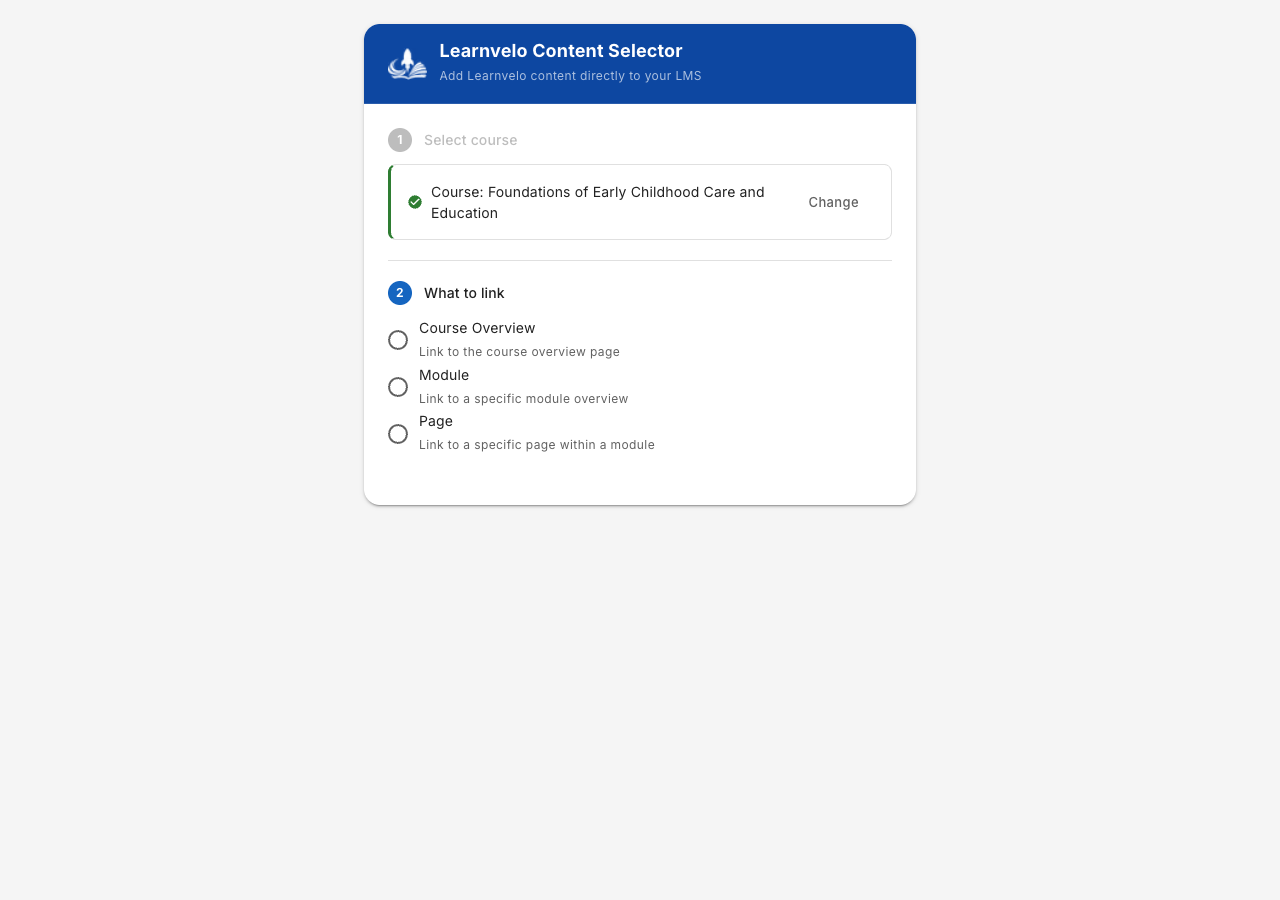
Using the Content Picker
The Learnvelo content picker guides you through selecting content in four steps. Each step appears as you complete the previous one.
Step 1: Select a Course
Type to search for a Learnvelo course. You will see:
- Courses you own
- Courses where you are a collaborator
- Public course templates
Select the course containing the content you want to add.
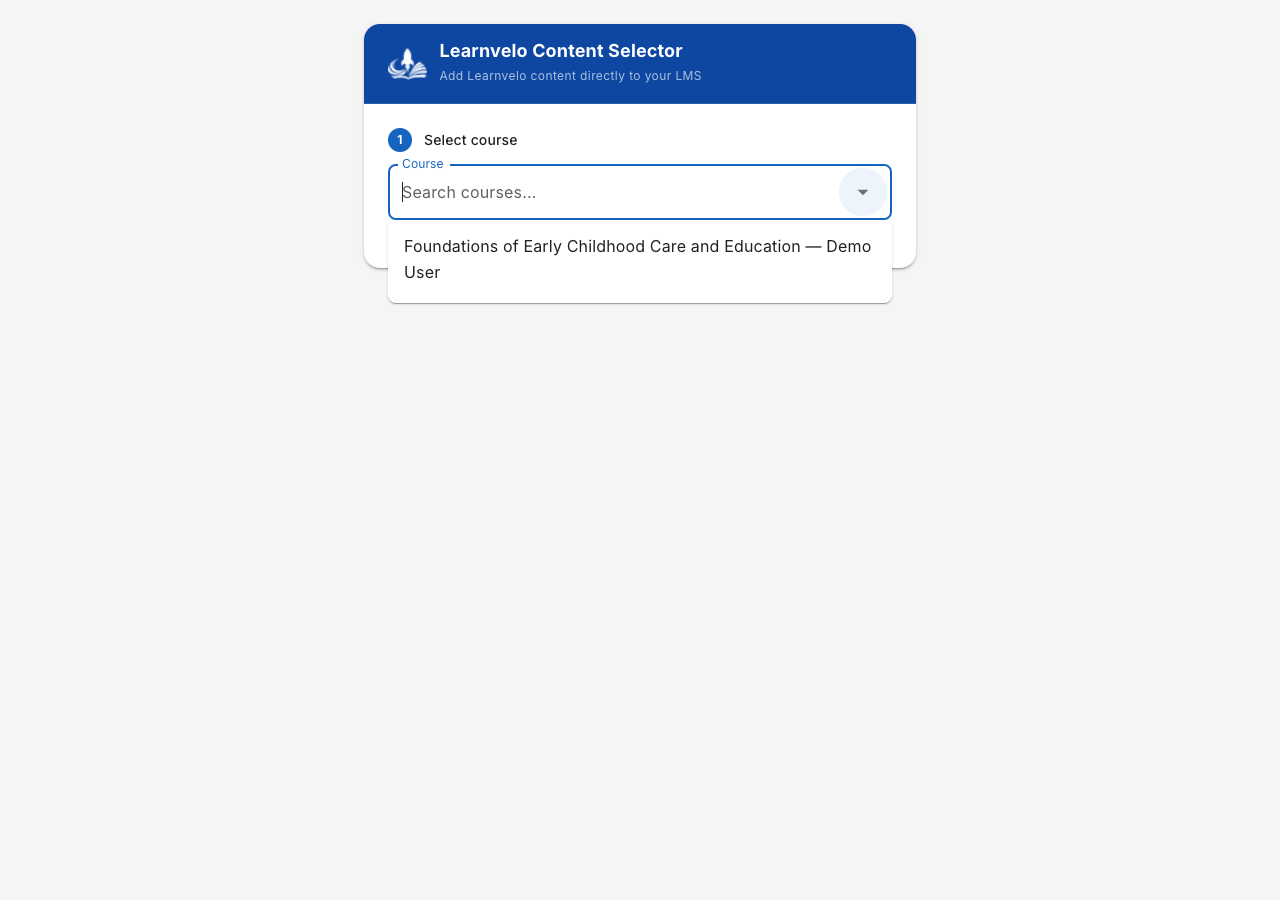
Once selected, the course appears as a confirmed selection with a “Change” button if you need to pick a different course.
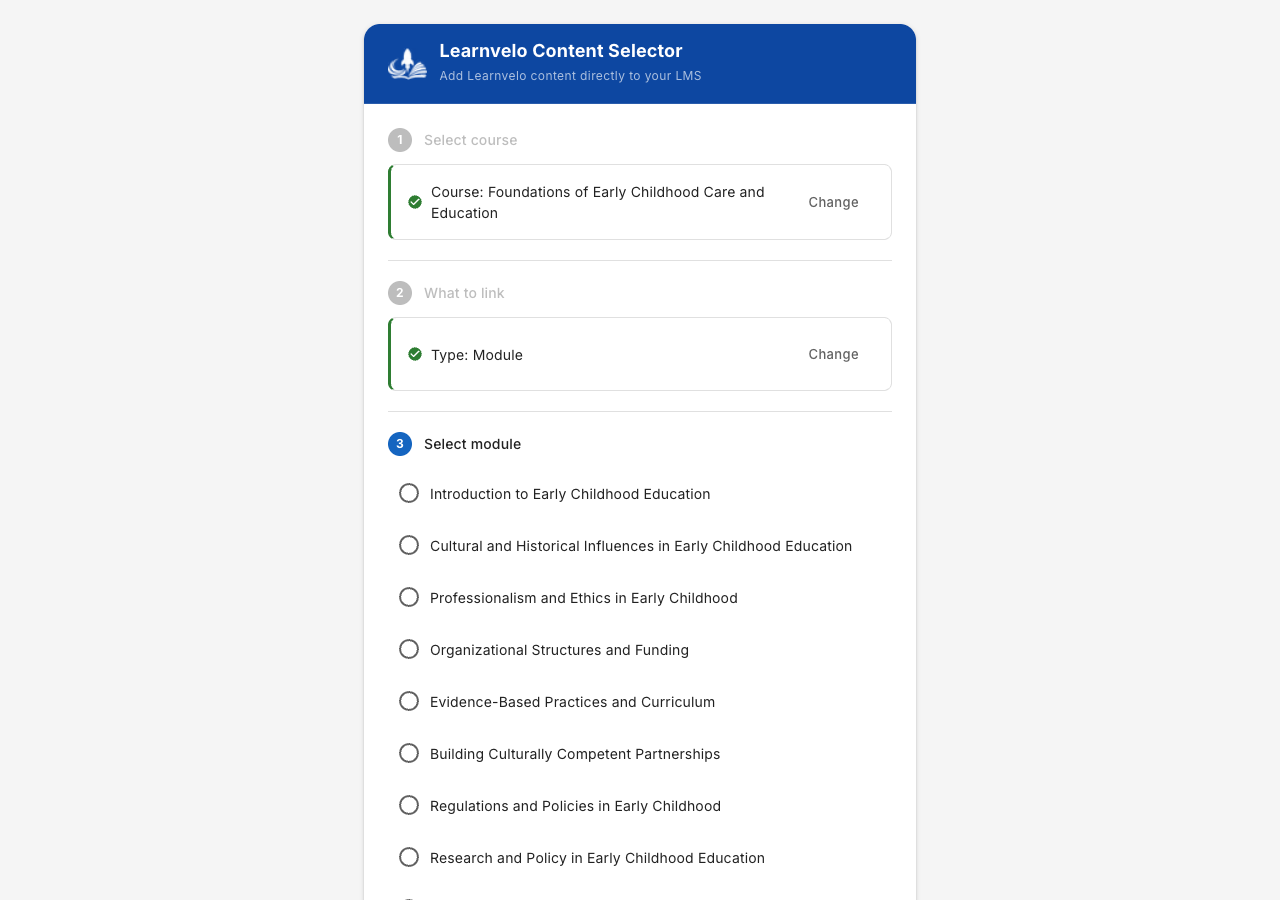
Step 2: Choose What to Link
Select the type of content you want to add:
| Option | Description |
|---|---|
| Course Overview | Links to the full course overview page, giving students access to all modules |
| Module | Links to a specific module overview page |
| Page | Links to a specific page within a module (reading, exercise, activity, etc.) |
Step 3: Select Content
This step appears when you chose Module or Page (Course Overview skips directly to options).
For modules: A list of all modules in the course appears. Select one (or multiple, if your LMS supports it).
For pages: First filter by module using the dropdown, then select individual pages. Each page shows its type (Reading, Exercise, Activity, Generic) as a label.
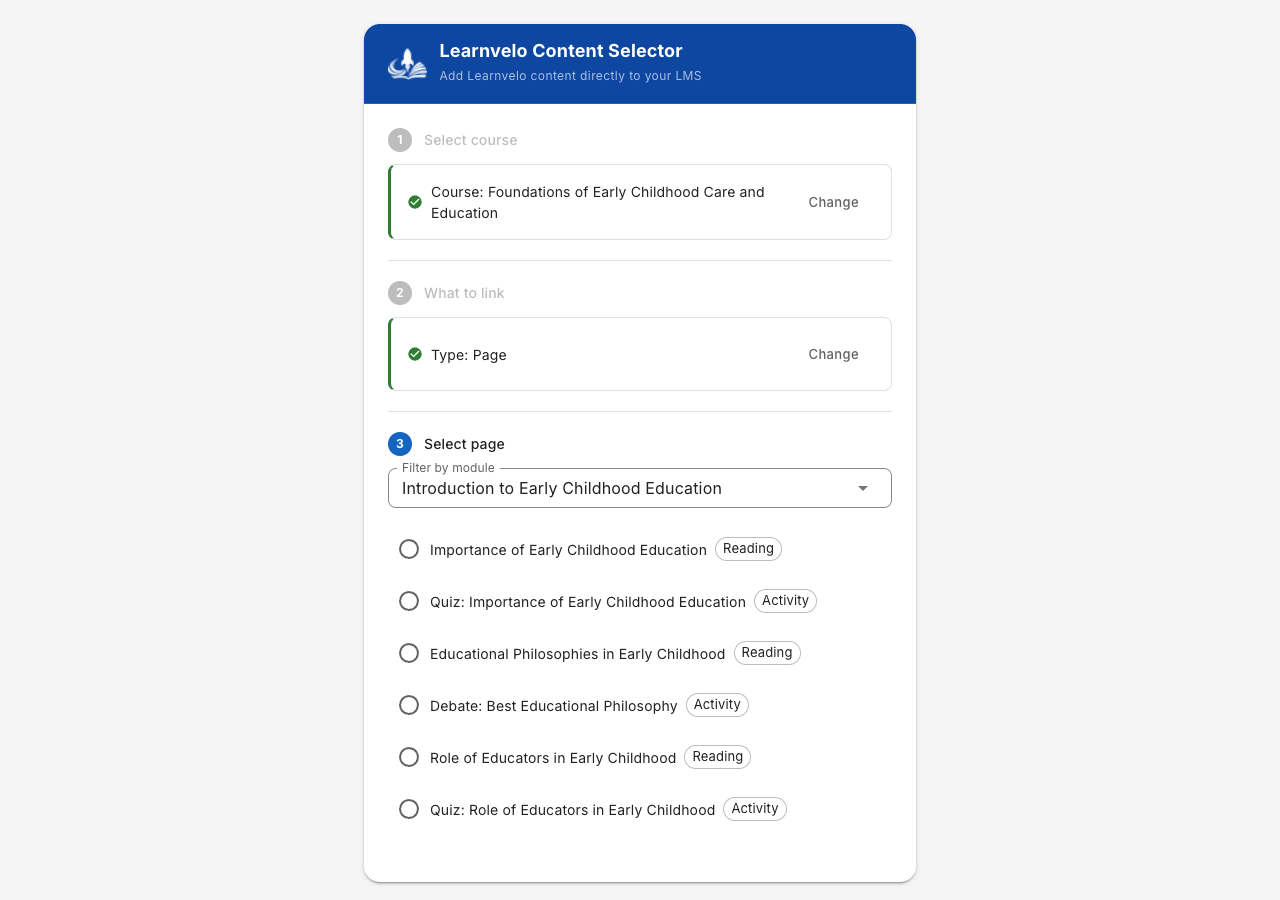
Tip: Some LMS platforms support selecting multiple items at once. When available, you will see checkboxes instead of radio buttons.
Step 4: Options
Configure how the content will appear and whether grades should be sent back to the LMS.
Display Mode
Choose how Learnvelo content appears when students click the link:
| Mode | Description | Best For |
|---|---|---|
| Content Only | Shows just the page content with no surrounding navigation | Embedding in an iframe within the LMS |
| Content + Course Navigation | Shows content alongside the course module sidebar | Letting students browse related content |
| Full | Shows content with Learnvelo header, logo, and navigation | Opening in a new tab |
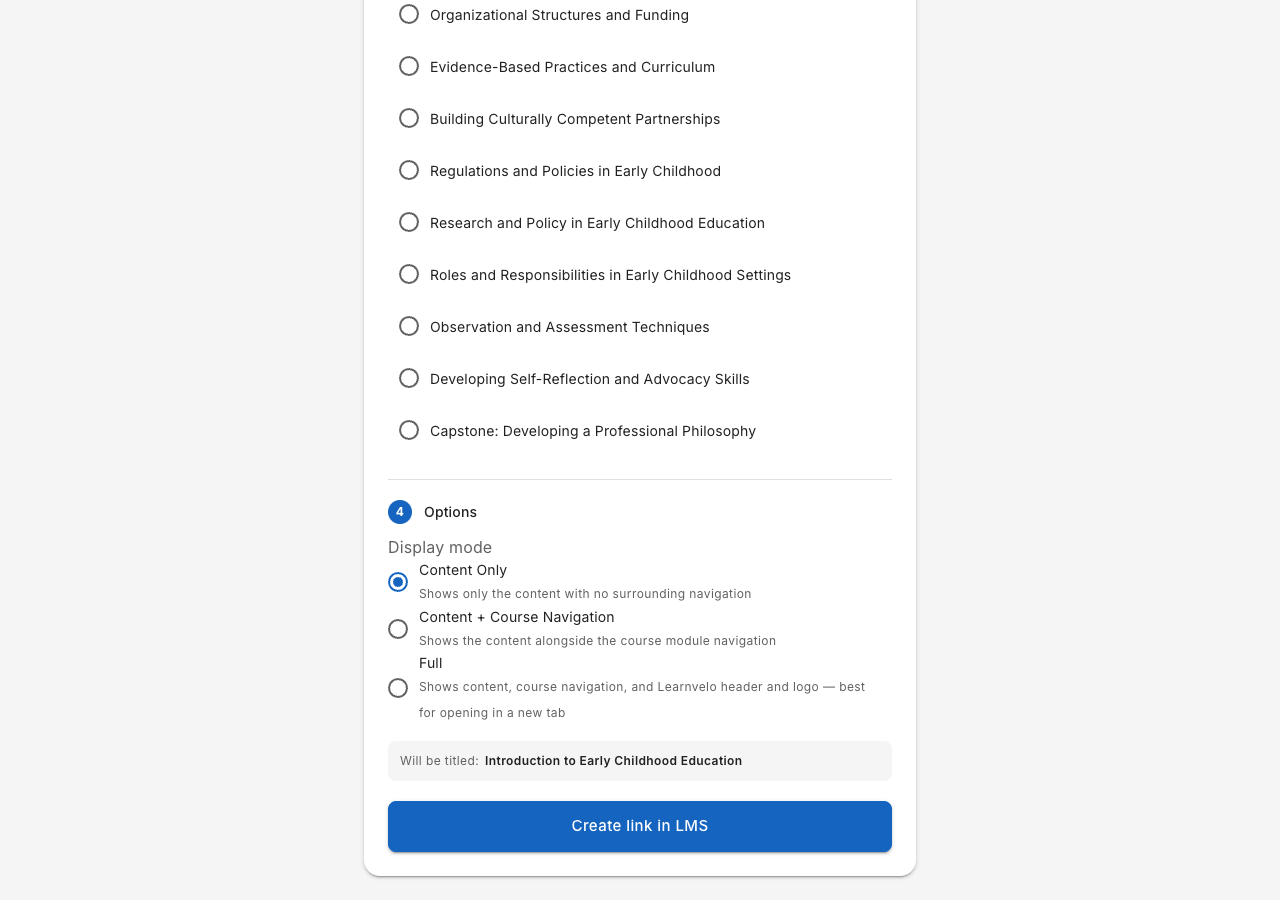
Recommendation: “Content Only” works best for most LMS integrations where content is displayed inside the LMS interface. Use “Full” if your LMS opens external tools in a new tab.
Grade Passback
When linking activity pages (quizzes, assessments), you can enable grade passback. This automatically:
- Creates a gradebook column in your LMS
- Sends student scores from Learnvelo activities back to your LMS gradebook
The grade passback toggle is automatically enabled when you select activity-type pages.
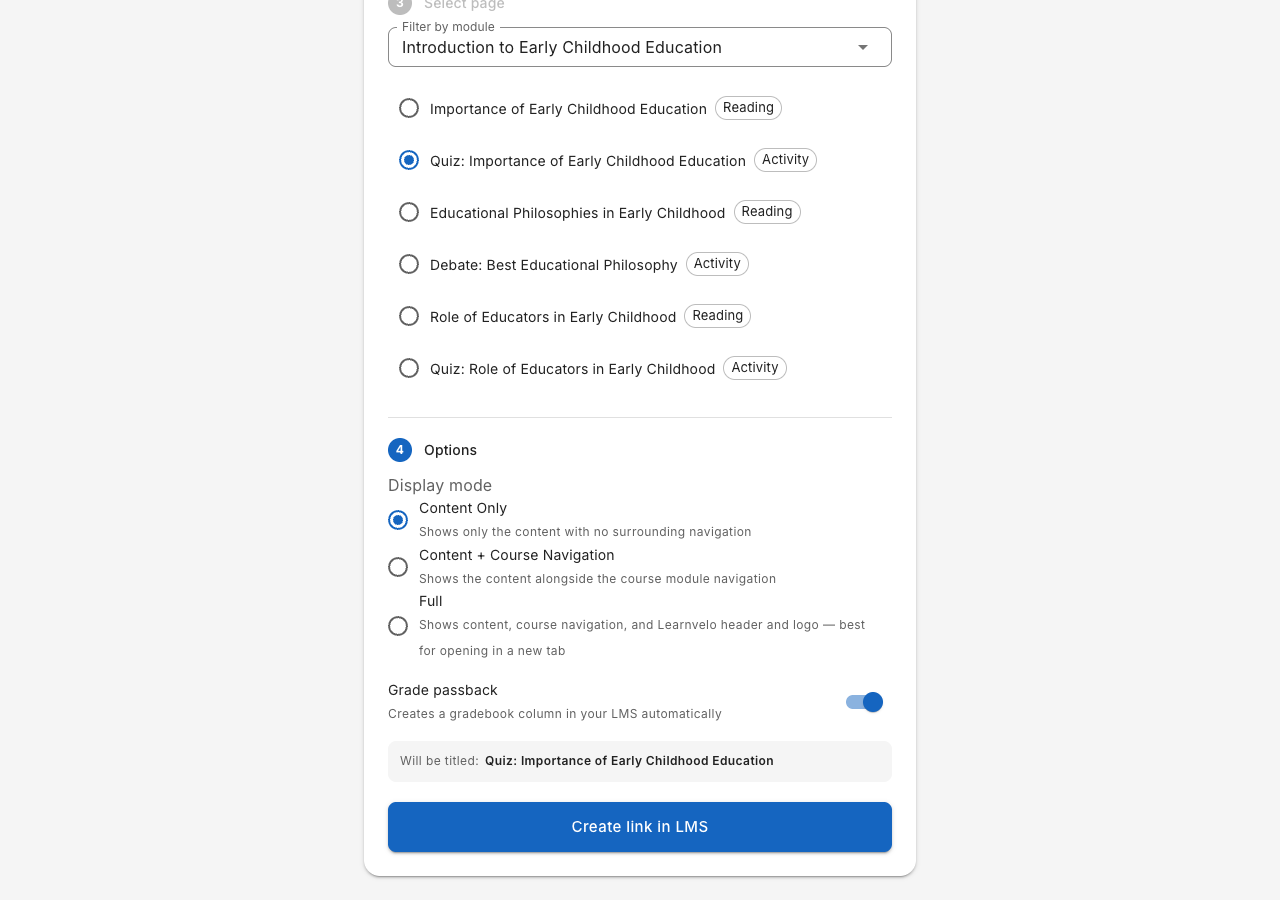
Submit
The bottom of the picker shows a preview of the link title and a submit button. Click Create link in LMS (or Create N links in LMS for multiple items) to send the content back to your LMS.

The content will appear in your LMS course. Students can click it to access the Learnvelo content.
What Students See
When a student clicks a Learnvelo link in the LMS:
- They are automatically authenticated via LTI -- no separate Learnvelo login required
- If they have an existing Learnvelo account with the same email, they may be asked to verify their identity with a one-time code sent to their email
- The content appears in the display mode you selected (Content Only, Content + Navigation, or Full)
Tips and Best Practices
Organize by Module
For a structured course, consider linking individual modules rather than the entire course overview. This gives you control over pacing and which content is available at each point in the semester.
Use Activity Pages for Graded Work
When you link activity pages (quizzes and assessments) with grade passback enabled, grades flow automatically to your LMS gradebook. This eliminates manual grade entry.
Content Only for Embedded Views
If your LMS displays external tools inline (within an iframe), use the Content Only display mode. This avoids showing duplicate navigation from both the LMS and Learnvelo.
Preview Before Publishing
After creating a link, click it yourself to verify the content loads correctly and the display mode looks as expected before making it available to students.
Troubleshooting
“Unable to load content picker”
- Ensure you are accessing the content picker from within your LMS (not by navigating directly to the URL)
- Try relaunching: close the content picker and click the Learnvelo tool again
- Contact your LMS administrator to verify the LTI integration is set up correctly
“No courses found” in the picker
- Verify you have courses with content in Learnvelo
- Check that you are logged into the correct Learnvelo account
- If you are a collaborator on someone else's course, it should appear in the search results
Students see “Authentication failed”
- The LTI integration may not be fully configured -- contact your LMS administrator
- If the institution is pending approval, LTI launches will not work until approved
Grades are not appearing in the LMS gradebook
- Verify grade passback was enabled when you created the deep link
- Ensure the student completed the activity in Learnvelo (partial completions may not trigger grade sync)
- Check with your LMS administrator that Assignment and Grade Services is enabled in the LTI tool configuration